Filament Bulb Bedside Lights

The part of our bedroom where the bed lives is very narrow so we only have space for  rather miniature bedside tables. We wanted to have matching lights for both sides of the bed but all the interesting lamps we came across would completely fill our little tables so we decided to find a way to hang the lights from the wall above the bed instead.

*Throughout this post I ask you to ignore our horrible silver bed frame and bedding – we’re working on it….*

Here’s the ‘before’ picture:

drill, bedside, light, filament, exposed, bulb, hang, wall, diy, retro, modern, small bedroom, solution, before

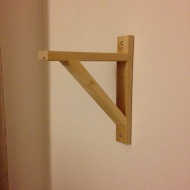
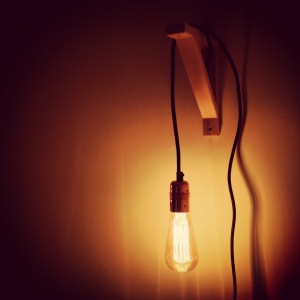
We were inspired by a recent trip to Sweden where we saw lots of lighting cords that had a plug on the end rather than needing wiring in. They were super expensive over there and obviously had the wrong kind of plug so we decided to find some when we got back. This proved much harder than we hoped until a trip to the Ideal Home Show at Christmas where we came across a stall selling the cords – complete with a plug and switch – and a selection of bulbs too. There were a few choices for the colour of the bit which you screw the bulb into (there is probably a name for that) so we went for ‘rose gold.’ We ‘haggled’ them down to £45 for two cords and two bulbs which was pretty good considering the bulbs alone are often around £12 each. We needed some brackets to hang the lights from so we took a trip to Ikea to pick up the Ekby Valter for £2 each.

drill, bedside, light, filament, exposed, bulb, hang, wall, diy, retro, modern, small bedroom, solution drill, bedside, light, filament, exposed, bulb, hang, wall, diy, retro, modern, small bedroom, solution, ekby, valter, ikea drill, bedside, light, filament, exposed, bulb, hang, wall, diy, retro, modern, small bedroom, solution, ekby, valter, ikea

It turns out our drill is intended more for use on things like wood and cotton wool than brick so this process took slightly longer than expected.

But we got there eventually!

4

drill, bedside, light, filament, exposed, bulb, hang, wall, diy, retro, modern, small bedroom, solution, ekby, valter, ikea, bed,

Unfortunately now that we have nice lighting the awful bed is even more apparent – any ideas on how to hide this would be much appreciated?? As the property is rented we can’t just get rid of it but thinking of ways to possibly box it in…

Thanks for reading!

Tali x


Super Quick Salt Dough Christmas Decorations

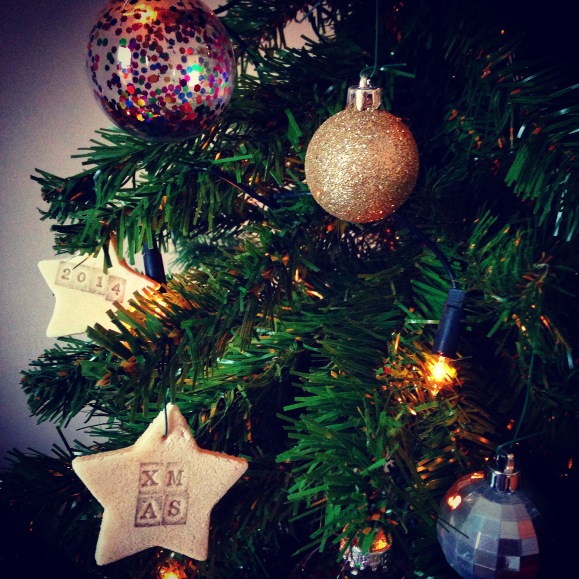
After decorating our Christmas tree on Monday (bit keen I know…) it was still looking fairly dull so I started trying to find crafty ideas to add to it. I kept coming across blogs with Salt Dough decorations so thought I’d give it a go – however most of the instructions suggested cooking them for 4 – 6 hours or leaving them out to dry for a couple of days! I definitely lack the patience for either of those so set about finding a quicker method of setting the dough – a bit of trial and error later and a few slightly exploded decorations and I found a much easier way where you can set the dough in about 5 minutes!

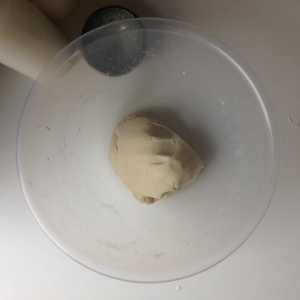
To make the dough mix 2 cups plain flour (I used a mug instead of the official ‘cup’ measurement as it’s just important to keep the proportions the same) with 1 cup regular table salt and gradually mix in 1 cup warm water – you might not need all the water, I had a teeny bit left over. Stir all the ingredients in a bowl and then knead until…. doughy? I’d say between 5-10 minutes depending on how buff you are (ha…)

It should look like this:

salt dough, christmas, craft, diy., hobby, decorations, homemade, xmas, festive,

Next, roll the dough out onto a very well floured surface. I found it best to roll it really quite thin – maybe 5mm – as this stopped the dough puffing up when cooked. Then cut out your decorations using cookie cutters. I started off making round ones but they looked a bit boring so I ended up doing stars instead.

salt dough, christmas, craft, diy., hobby, decorations, homemade, xmas, festive,

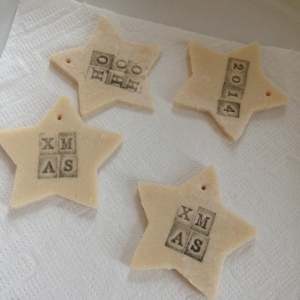
To make the decorations more interesting I then jazzed them up using an ink pad and some individual letter stamps which I bought from Amazon.

IMG_7358 salt dough, christmas, craft, diy., hobby, decorations, homemade, xmas, festive,


salt dough, christmas, craft, diy., hobby, decorations, homemade, xmas, festive,

Don’t forget to pierce a small hole in the decorations if you’re planning to hang them – I used a cocktail stick – and now they are ready to ‘bake’.

This is where my incredible cooking skills really came in handy as I stuck the decorations in the microwave!

Initially the dough kept puffing up as it was heating too fast and the moisture was trying to escape too quickly so I turned the microwave to a lower setting and tried again. After a few attempts at this and lots more turning the microwave down I found the perfect setting was the lowest one – you know the one that’s even lower than defrost and you’ve never used before? We shall call it the Salt Dough setting.

I’d suggest cooking for about 1.5 mins then flipping over – continue this until they are completely hard and dry – should take about 5 minutes ish… And there you go!

This amount of dough makes about 35 decorations so filled all the tree gaps nicely and I had enough left over to make a garland for over the mirror.

salt dough, christmas, craft, diy., hobby, decorations, homemade, xmas, festive, tree, garland, ink, stamp, baubles

salt dough, christmas, craft, diy., hobby, decorations, homemade, xmas, festive, tree, garland, ink, stamp, baubles

Hope you like them!

Thanks for reading,

Tali x