Super Quick Salt Dough Christmas Decorations

After decorating our Christmas tree on Monday (bit keen I know…) it was still looking fairly dull so I started trying to find crafty ideas to add to it. I kept coming across blogs with Salt Dough decorations so thought I’d give it a go – however most of the instructions suggested cooking them for 4 – 6 hours or leaving them out to dry for a couple of days! I definitely lack the patience for either of those so set about finding a quicker method of setting the dough – a bit of trial and error later and a few slightly exploded decorations and I found a much easier way where you can set the dough in about 5 minutes!

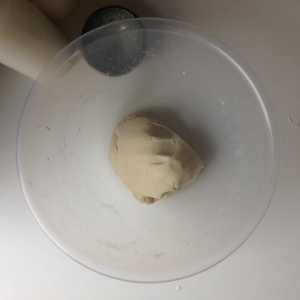
To make the dough mix 2 cups plain flour (I used a mug instead of the official ‘cup’ measurement as it’s just important to keep the proportions the same) with 1 cup regular table salt and gradually mix in 1 cup warm water – you might not need all the water, I had a teeny bit left over. Stir all the ingredients in a bowl and then knead until…. doughy? I’d say between 5-10 minutes depending on how buff you are (ha…)

It should look like this:

salt dough, christmas, craft, diy., hobby, decorations, homemade, xmas, festive,

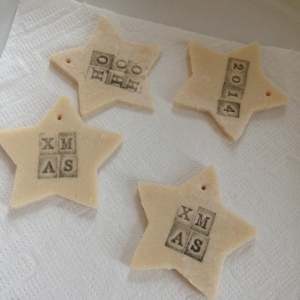
Next, roll the dough out onto a very well floured surface. I found it best to roll it really quite thin – maybe 5mm – as this stopped the dough puffing up when cooked. Then cut out your decorations using cookie cutters. I started off making round ones but they looked a bit boring so I ended up doing stars instead.

salt dough, christmas, craft, diy., hobby, decorations, homemade, xmas, festive,

To make the decorations more interesting I then jazzed them up using an ink pad and some individual letter stamps which I bought from Amazon.

IMG_7358 salt dough, christmas, craft, diy., hobby, decorations, homemade, xmas, festive,


salt dough, christmas, craft, diy., hobby, decorations, homemade, xmas, festive,

Don’t forget to pierce a small hole in the decorations if you’re planning to hang them – I used a cocktail stick – and now they are ready to ‘bake’.

This is where my incredible cooking skills really came in handy as I stuck the decorations in the microwave!

Initially the dough kept puffing up as it was heating too fast and the moisture was trying to escape too quickly so I turned the microwave to a lower setting and tried again. After a few attempts at this and lots more turning the microwave down I found the perfect setting was the lowest one – you know the one that’s even lower than defrost and you’ve never used before? We shall call it the Salt Dough setting.

I’d suggest cooking for about 1.5 mins then flipping over – continue this until they are completely hard and dry – should take about 5 minutes ish… And there you go!

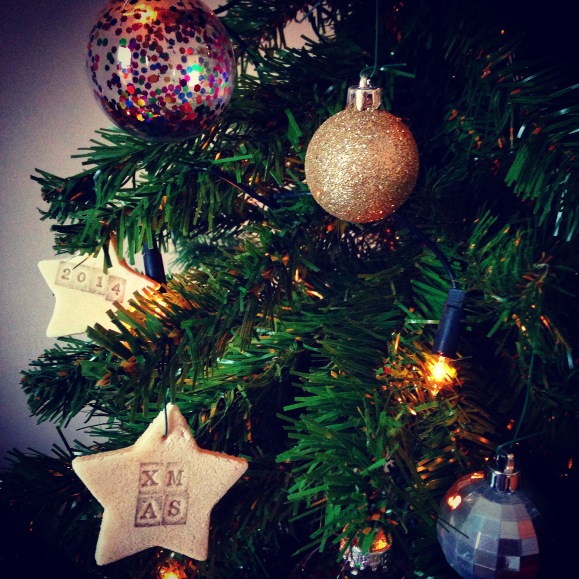
This amount of dough makes about 35 decorations so filled all the tree gaps nicely and I had enough left over to make a garland for over the mirror.

salt dough, christmas, craft, diy., hobby, decorations, homemade, xmas, festive, tree, garland, ink, stamp, baubles

salt dough, christmas, craft, diy., hobby, decorations, homemade, xmas, festive, tree, garland, ink, stamp, baubles

Hope you like them!

Thanks for reading,

Tali x


DIY Advent Calendar!

This year I decided to do something a little different for my boyfriend’s Advent Calendar as sadly I couldn’t quite afford this £140 Rum filled Drinks By The Dram one from Selfridges….

Advent calendar, christmas, selfridges, rum, luxury, 2014, festive, gift, inspiration

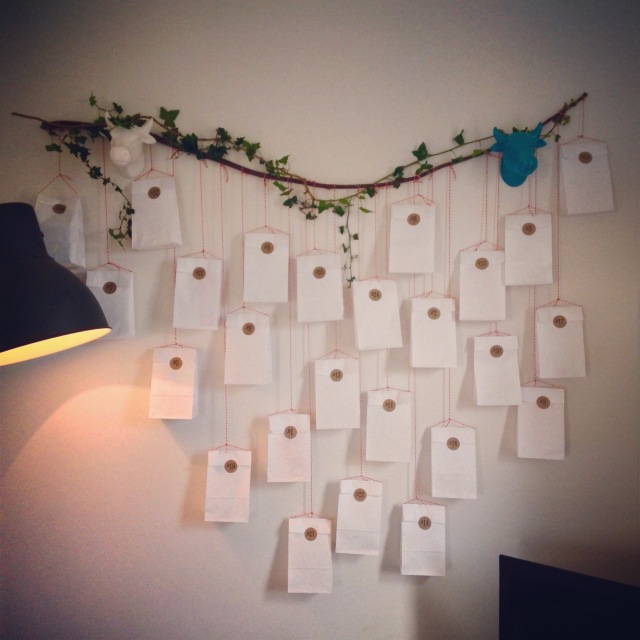
So I took the next best option and went on eBay – I bought 25 paper sweet bags, 20m red and white bakers twine and some numbered vintage looking stickers. I sourced a large twig and some ivy from the park and bought a selection of his favourite chocolate – plus a little extra something for his birthday day which is in December.

paper bags, advent calendar, homemade, craft

After filling the bags, I sealed them and tied them to on to the twig.

IMG_7319

When all the bags were attached (3 hours later…) I finished it off with the sprig of ivy.

IMG_7328

And voila!

advent calendar, christmas, homemade, diy, crafts, unique, natural, outdoors, festive, season, present, home, inspiration

Let me know what you think!

Thanks for reading,

Tali x

Trend: Modern Pastels

I’m currently stockpiling empty jam jars because I saw a great tutorial on how to transform them into gorgeous pastel coloured vases like these:

chalky pastel jam jar paint vase recycle

To make your own use up any old paint you have lying around – or buy the smallest tester pot you can find – and pour a small amount into a clean, dry jar. Tilt the jar to swirl the paint around until the inside is completely coated and leave it somewhere warm to dry for a couple of days.

Et voila! They’re great for displaying flowers or even just as a pot for pens on your desk.

If that’s not completely satisfied your penchant for pastels then here’s a few sliiightly less thrifty purchases (£4299 on a sofa is reasonable right…?) to complete the trend in your home!

pastel trend home interior accessories design colourful 2014 yellow sofa

1.Mayor Oak Sofa by &Tradition, Nest.com £4299 || 2.Striped Wool Blanket, Zara Home £69.99 || 3.XL Boom Palm Tray, Heal’s £20 || 4.Hive Pendant Light, Made.com £99 || 5.Glass Vase, H&M £3.99 || 6.Twiitter Table Lamp, Heal’s £120 || 7.Blossom Side Table, Habitat £50 || 8.Maya Poster by Ferm Living, Coolshop £23.99

Thanks for reading,

Tali x